April 26, 2026
Taking Control: OpenWrt, Pi-hole, and a Network I Can Actually Configure
The Verizon gateway that came with my cellular service works fine as an appliance. Solid uptime, no complaints from the family. But it’s a black box: no way to set a custom DNS server, no real firewall between network segments, no room to grow. I’ve been working toward CCNA certification and doing Linux administration coursework, and at some point the gap between what I was studying and what I could practice on at home got uncomfortable.
The solution wasn’t to replace the Verizon box. Fighting with the cellular modem side of it isn’t worth the trouble. Instead, I put a router I could actually configure behind it: a TP-Link Archer C7 v2 running OpenWrt, picked up used for $33 shipped. Double-NAT by design, not by accident.
This is the first post in a series documenting that build. The plan eventually involves a Cisco Catalyst managed switch, a thin client running a monitoring stack, IoT sensors on an isolated VLAN, and a security layer that can actually see what’s happening on the network. This post covers the foundation: the routing layer, DNS filtering, and the problems that came up along the way.
The Architecture
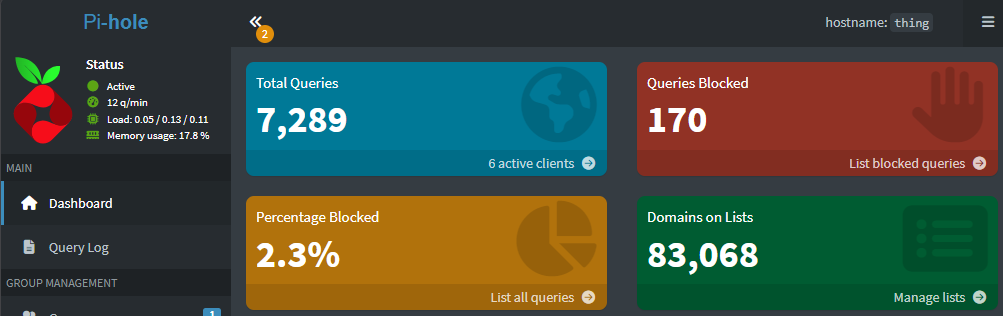
The setup is straightforward on paper. The Verizon box (192.168.0.1) handles the WAN connection and the family WiFi. The C7 sits behind it as a downstream router, handling routing, firewall rules, DNS, DHCP, and eventually VLANs. The C7’s WAN port connects to one of the Verizon box’s LAN ports. Everything on the C7’s LAN side is invisible to the Verizon network except through explicit port forwarding.
Double-NAT has a reputation for causing problems with gaming, VoIP, and port forwarding. For this use case it’s a non-issue. The only service exposed outward so far is a Minecraft Bedrock server, and the port forwarding chain through both routers worked without any trouble.
Internet
    |
Verizon cellular gateway (192.168.0.1) -- family WiFi, cellular WAN
    |
C7 WAN
C7 LAN (192.168.1.1)
    |
    +-- LAN1: thing (Ubuntu 24.04, 192.168.1.111)
    +-- LAN2: quantum (Dell + dock, 192.168.1.222)
    +-- ether  (5GHz WiFi -- trusted devices)
    +-- labnet (2.4GHz WiFi -- IoT/ESP32, future VLAN 20)
Flashing OpenWrt
The C7 arrived from the previous owner with OpenWrt 25.12.1 already installed, which saved a step. Upgrading to 25.12.2 was a straightforward SSH and sysupgrade operation.
One thing to know: scp to an OpenWrt router fails by default. There’s no sftp-server installed, so the modern SCP protocol has nothing to talk to. The -O flag forces legacy mode and it works:
scp -O openwrt-25.12.2-...-sysupgrade.bin root@192.168.1.1:/tmp/
Flashing from there is a single command over SSH:
ssh root@192.168.1.1 "sysupgrade -v /tmp/openwrt-25.12.2-...-sysupgrade.bin"
The session drops when the router reboots. Wait a few minutes, ping 192.168.1.1, and it comes back on the new version.
If you’re running OpenWrt 25.x, the firewall subsystem is nftables, not iptables. A lot of older documentation and configuration examples reference iptables commands that won’t work. That matters before you start troubleshooting rules that appear to apply and silently don’t.
Getting SSH Working from quantum
quantum is a Dell laptop with no native ethernet port — it connects through a USB docking station. That detail created more friction than expected.
dhclient is gone from Ubuntu 24.04. The command I reached for to bring up the ethernet interface doesn’t exist anymore. The replacement is networkctl:
sudo networkctl up enp1s0
The second problem was subtler. WSL doesn’t expose the physical ethernet adapter — it gets its own virtual interface. SSH from inside WSL was going out through WiFi and hitting the Verizon network instead of the C7’s LAN. The fix was to SSH from PowerShell instead, binding to the right source IP:
ssh -b 192.168.1.136 mind@192.168.1.111
The cleaner long-term solution is a BindAddress entry in ~/.ssh/config. For WSL-native SSH, a persistent static route in /etc/wsl.conf handles it:
[boot]
command = ip route add 192.168.1.0/24 via 172.24.128.1
That survives restarts and makes ssh thing work from WSL as expected.
The TCP Wrappers Problem
Once routing was sorted, SSH from quantum to thing was still failing. The connection was being reset during the handshake, before key auth even came into play. The SSH journal on thing made it obvious:
refused connect from 192.168.1.136 (192.168.1.136)
thing had /etc/hosts.deny set to ALL: ALL, with /etc/hosts.allow only covering 192.168.0.x. That was the Verizon subnet it had always been accessed from. Connecting from the C7’s LAN side was a new source that wasn’t allowlisted. The fix:
# /etc/hosts.allow
sshd: 192.168.0. 192.168.1.
TCP wrappers evaluate live. No restart needed, and the connection worked immediately.
Pi-hole: Why Not Docker
Pi-hole on Docker looked like the obvious path. Everything else on thing runs in containers, Pi-hole has an official image, and it should have been one command.
It wasn’t.
Ubuntu 24.04 runs systemd-resolved with a stub listener on port 53. The container failed immediately on that conflict. Disabling the stub listener is straightforward, but it’s a step the documentation doesn’t lead with.
Pi-hole v6 changed how several environment variables are passed in. Configuration that worked for v5 silently failed or behaved differently, which cost time to track down.
Pi-hole’s gravity update script uses getent hosts to resolve domains when downloading blocklists. The Docker image is Alpine-based, which uses musl libc. Musl’s getent implementation reads /etc/resolv.conf directly and doesn’t fall through the way glibc does. With the container’s resolver pointing somewhere that wasn’t working, getent returned nothing and gravity failed without a useful error.
The real blocker was further down. Outbound UDP port 53 from the container to external resolvers was timing out. The C7 blocks outbound UDP 53 to anything outside the LAN. Pi-hole needed to resolve through the C7’s local dnsmasq instead of reaching out directly, but getting the container’s DNS configuration to do that correctly while also serving DNS to the LAN was more work than the approach deserved.
The native installer took about two minutes:
curl -sSL https://install.pi-hole.net | bash
Upstream DNS pointed at the C7 (192.168.1.1) with the Verizon gateway as a fallback. The C7’s DHCP server hands out 192.168.1.111 as the DNS server for every LAN client. Every device that picks up an address gets Pi-hole automatically.
The Docker detour wasn’t wasted. Working through each failure made it clear exactly why this environment was incompatible with that approach: the musl libc behavior, the Pi-hole v6 changes, and the C7’s firewall posture all stacked against it.
WiFi
The C7’s radios stayed off until the wired setup was stable. Enabling WiFi before any switch configuration gives you a fallback access method that doesn’t depend on the wired bridge being intact — a lesson that came from experience, described below.
Two SSIDs: ether on 5GHz for trusted devices, labnet on 2.4GHz for IoT and ESP32s. Both WPA2. The band split is intentional: ESP32s don’t support 5GHz, and keeping IoT devices on 2.4GHz means the radio assignment and the future VLAN assignment will line up naturally. WPA3 was considered for labnet and skipped. ESP32 WPA3 support is inconsistent across firmware versions, and WPA2 is adequate for a network that will sit behind a firewall anyway.
What Came Out of Building It
An early attempt at switch configuration — adjusting VLAN assignments via swconfig before the Catalyst arrived — caused complete loss of connectivity across all ports. Not one port, all of them. The C7 required two factory resets before the bridge was back in a working state. The lesson landed early: enable WiFi in software before touching anything on the switch side, so there’s a fallback that doesn’t depend on the wired bridge. That’s now a standard step before any switch work — and it came in handy later when the real VLAN migration hit its first wall.
The Pi-hole situation was a good reminder that “it runs in Docker everywhere else” isn’t the same as “it will work in Docker here.” A combination of environmental factors made the containerized path genuinely impractical for this specific setup, not just inconvenient.
Where This Is Going
The current setup is a flat 192.168.1.x network with DNS filtering and two WiFi networks. The next step is a Cisco Catalyst WS-C2960C-12PC-L — a managed PoE switch that enables proper VLAN segmentation and port mirroring for traffic analysis.
The planned VLAN structure avoids VLAN 1 entirely. VLAN 1 is the default native VLAN on 802.1Q trunks, which makes it the outer tag in double-tagging attacks. Easier to just not use it.
VLAN 10 will be the trusted LAN (192.168.10.x), covering wired ports and ether WiFi. VLAN 20 is lab and IoT (192.168.20.x), covering labnet WiFi and the ESP32s and sensors that will eventually join it. VLAN 99 is a black hole: all unallocated switch ports land there with no routing and no internet access, keeping empty ports from being a liability.
Moving to that structure will require updating DHCP reservations, static routes on quantum, and the port forwarding rules for the Minecraft server. Not a large change, but worth doing in one deliberate pass.
The next post covers the Catalyst.